Remember a few days ago I mentioned I was making these loomed woolly hats for the Operation Christmas Child project? Well, my next big idea after that one was making a pile of simple, unlined drawstring backpacks for the project too. The university I work for changed its corporate branding a year ago. This meant that everything which had the old logo on it was pretty much designated for the scrapheap – including a number of very large, navy blue cotton/polyester table cloths. I asked colleagues who were getting rid of their old corporate table cloths to let me have them. They were happy to do so and that left me sitting on a dozen of these table cloths. I figured since I had all these free table cloths handy, I would turn them into something for the children. These drawstring backpacks are big enough to carry a few essential items to school, or some gym kit or even a few toys. I thought I’d put together a tutorial in case you were interested in having a go at making one (or several).
First I cut two bag pieces measuring 16.5 inches x 14 inches from the plain tablecloth. I also cut two strips of a contrasting fabric measuring 14 inches x 2 inches. These would form the casing for the cord. As my main fabric was very plain, I decided to liven it up a little by adding a length of printed ribbon to each side of the bag. I found a roll of this really colourful and cute wire-edge woven ribbon. The ribbon is approximately 1.75 inches wide. I cut two pieces of ribbon roughly 15 inches long and with some tweezers, carefully pulled the thin wire out from each edge. Here are my pieces of fabric and the ribbon I used.
You don’t have to use ribbon, you can use any printed fabric. You can use scraps or perhaps even strips from a jelly roll. Just turn down a ¼ (quarter) inch hem on each side before you stitch it down onto your main fabric.
I positioned my ribbon pieces about 5 inches from the bottom of each of the bag pieces. Instead of using pins to hold the ribbon in place, I used a smidgeon of fabric spray adhesive. I then stitched the ribbons to the bag pieces. I used a straight stitch and over the top of that, I ran a zig-zag stitch all the way along for decorative purposes.
Next I sewed the two narrow strips for the casing together at the narrow ends, ironed the seams open and set the resulting fabric loop aside for the time being.
I pinned the bag pieces right sides together, making sure that the ribbon edges line up. I then used my tailors’ chalk and made a mark ½ (half) inch down from the top edge. I then made a second mark ¾ (three quarters) inch down from my first mark. When you are sewing the bag pieces together, you want to leave the gap between the first and second chalk marks unstitched. I marked my stitching line in chalk (see the right picture below) to show you where the stitches would go and the gaps too. I first saw this method when Anna from Noodlehead used it in constructing her drawstring backpack.
As I wasn’t going to line this bag, I wanted to keep my edges tidy. So I pinked the excess fabric from the seam allowances but left the top inch un-pinked. This will keep a tidy edge where the opening for your casing would be once you iron it flat. This is also the part which would be covered up by the casing. I also clipped the corners.
I ironed the seam open at the top of the bag where I had left the gap in the stitching. Whilst I had the iron hot, I ironed on 4 scraps of 2 inch x 2 inch fusible interfacing - one on each side of both bottom corners. This is needed later on when making the anchor points for my drawstring cords.
I turned the bag right side out. Remember those casing strips earlier? With wrong side up, I slid the loop of fabric onto the bag. Both right sides of fabric were facing together now. I matched the side seams, pinned and stitched ½ (half) inch from the top edge.
See the hole for the cord to go through?
I folded the casing over and pressed a ¼ (quarter) inch under.
I ironed the casing so it sat flat around the top edge of the bag. I then sewed the casing down.
Using the automatic buttonhole function on my sewing machine, I sewed a button hole at each of the bottom corners of the bag as anchor points for my drawstring cords. I used a pin to mark the top of the button hole, pushing it across the buttonhole width ways and then cut the button hole open with my seam ripper. The shank of the needle stops my seam ripper from going beyond that point.
If you’re not comfortable making buttonholes with your sewing machine, there are other ways of anchoring the drawstring cords. For example, Mama Urchin uses metal grommits on her drawstring backpacks. Anna from Noodlehead uses little sewn in tabs as anchor points.
I have this nifty little bodkin which looks like a pair of tweezers with a tiny ring on it. It’s fantastic for gripping the ends of cord or wide elastic. Neat huh?
Gripping the end of my cord with my bodkin, I feed the cord through the opening, starting with one side then going through the both openings on the opposite side, and making my way back to the other opening on the first side. By doing this, I’ve made my cord go a full circle. I repeated this with other piece of cord starting at the opposite side. When finished, I had two tails coming from each side. I fed one end through the button hole on one side and made a knot. I repeated the same thing on the other side.
Here is my finished drawstring backpack.
And here is the casing which holds the cords.
If you want to make a fully lined drawstring backpack, have a look at Anna’s awesome tutorial here.
I reckon with a bit of careful planning and cutting, I can get 8 or 9 of these backpacks from each of my old corporate tablecloths. I’m hoping that they will find new homes with several young children this coming Christmas and I also hope that the fun printed ribbons will make the children very happy.
"Make it your ambition to lead a quiet life, to mind your own business and to work with your hands...." 1 Thessalonians 4:11
Monday, 31 May 2010
Sunday, 30 May 2010
Three years on ...
... it is hard to imagine our lives without this bright spark of a thing. Missy Moo turned 3 on Friday. Here is a picture of her when she was but a day old.
And here she is today.
When I was One,
I had just begun.
When I was Two,
I was nearly new.
When I was Three
I was hardly me.*
Happy birthday Missy Moo!
(*An extract from A.A Milne's "Now we are six")
And here she is today.
When I was One,
I had just begun.
When I was Two,
I was nearly new.
When I was Three
I was hardly me.*
Happy birthday Missy Moo!
(*An extract from A.A Milne's "Now we are six")
Thursday, 27 May 2010
Shabby Apple Queensland Swimsuit Giveaway
Check out this giveaway at Grosgrain's blog!
Shabby Apple Queensland Swimsuit Giveaway
I love Shabby Apple's dresses - they are completely gorgeous. *Sigh*
And the new swimsuit range is very very nice - bags me the Baudin Beach halter please.
Kathleen of Grosgrain also posted this fab tutorial for a poolside robe. Perfect thing to go with the swimsuit, don't you think?
Tuesday, 25 May 2010
Super easy yummy banoffee pie
Dinoboy has decided he really likes this particular banoffee pie and it was easy enough for him to make with a little supervision. We made a small quantity - I normally just wing the amounts. You’ll need the following if you want to try making this. Feel free to adjust the amounts to suit the number of people you wish to serve. This recipe probably serves either 2 adults or 3 kids I reckon.
Digestive / sweetmeal biscuits (we used 6 regular McVities digestive biscuits – because that was all I had left! I’d probably use a few more to get a thicker base)
15 - 20gm melted butter
1 large banana
Dulce de Leche (we didn’t have regular Dulce de leche – so we used the chocolate version! Any shop-bought Dulce de Leche would do)
Double cream (we used about 250ml)
Half a teaspoon of sugar
Few drops of pure Vanilla extract
You’ll have to make the biscuit base at least a couple of hours ahead of serving so it has time to harden in the fridge. We made ours in the morning before school / work. Crush the biscuits up finely. We used our trusty baby food-grinder to do this but a zip-lock bag and a rolling pin would be equally effective.
Melt the butter gently in your microwave or over a tub of hot water. Add the melted butter to the biscuit crumbs and mix it up well. Press the crumb mixture into the base of a dish or in our case, a plastic tub. Put it into the fridge and leave it for a couple of hours or longer.
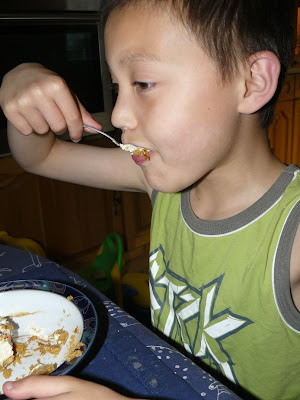
Slice up the banana and lay the slices on top of your biscuit base. (check out the look of concentration on that face. Love it!)
Then pour on - or in our case, squeeze on the Dulce de Leche. Here’s what ours looks like.
Dinoboy likes this part. MissyMoo does too. You want a generous layer of Dulce de Leche on top of the banana slices.
In a mixing bowl, pour in the double cream, add the sugar and vanilla extract and whisk it until it’s whipped and thick. Spread the whipped cream on top of your banana and Dulce de Leche.
Lightly cover with a sprinkle of your choice. You can use cocoa powder or in our case, Dinoboy wanted rainbow sugar sprinkles.
Dinoboy and MissyMoo really enjoyed this dessert.
Haha! Look at MissyMoo's face!
If you do have a go at this recipe, let me know what you think.
Monday, 24 May 2010
I know Christmas might seem ages away yet but ...
... I am nowhere near my pledged target of 24 woolly hats for the Operation Christmas Child project.
I need to back up a bit and tell you about how I got started on this. Last Christmas, a colleague at work introduced us to the Operation Christmas Child project. This organisation asks people to donate a shoe-box of gifts for children in under-priviledged parts of the world. The idea is that you would wrap up a shoe-box, fill it with gifts for a girl child or boy child of a particular age and take it to a designated collection point. The OCC staff will then collect the boxes, take them back to their warehouses, check the boxes are OK and the gifts suitable, then they send the boxes to children in Africa, Eastern Europe and Central Asia. My colleague started volunteering at the local warehouse in our region at the beginning of this year. She told me that often, the boxes they received would be under-filled or perhaps filled with inappropriate items. She said that OCC needed hats and other simple items as back-up / filler gifts. So I had this big idea that I would make some woolly hats. There was just one big problem, I do not knit or crochet.
A fellow crafter suggested making hats using a loom. I figured I could do that. Have you seen a round loom before? Here is the small loom I started off with.
With a loom, I can make these hats.
Or these hats with the pom-poms.
They look really cute on kids. Here's one on my son, DinoBoy.
I've made 9 hats so far. I still have some way to go! The good thing is they're quick to make.
After my big idea about making hats, I had another big idea. Haha! You'd think I'd had enough of the big ideas right? Well, this time, I thought I could sew simple drawstring backpack bags for the OCC boxes. I tell you about those in the next post.
Sunday, 23 May 2010
Did I mention I started out making bags and purses?
Well I did. And for someone who had no idea about sewing, the internet was a wonderful place to seek out and learn about sewing. There are so many wonderful people out there in the vast www who share so generously of their skills and knowledge. People like Lisa Lam of U-handbag. Lisa's Basket style bag tutorial was the first tutorial I really sunk my teeth into and had a proper go at. The resulting bag was this ...
I normally do my sewing after the children have gone to bed. I get about 2 hours of me-time. Sewing is a great de-stressor. I break each project down into manageable chunks - for example, one night I might be cutting out the fabric and interfacings. On another night, I might be making the pockets and so on. I thought I might share some of my bags with you in this post.
Here is a tote I made for my mother to go to her bible-classes with ....
Here is another basket style bag ....
This one is based on one of Lisa Lam's patterns, the Simply Stylish Handbag.
I made this purse for my aunt who adores teapots ...
And more recently, I discovered Australian designer, Nicole Mallalieu. I made this bag with her City Bag pattern. Nicole's patterns have very good instructions - almost a bag-making course in itself.
That's it for today. I'll have to dig through my PC's memory banks and find a few more to share another day.
Upcycle ... refashion ... does this count as a tutorial?
I work full-time - leaving the house at 8.15 am with toddler tucked under one arm and lunch-bag and handbag tucked under the other. I don't normally get home until 5.30 pm after collecting both children from their various child-care establishments. One of the big problems I have every year is having enough clothes which are smart enough for office wear (gone are the days when I can get away wearing jeans and a tshirt to work *sigh*) but are comfortable (at my age comfort is a significant factor!) and require very little care or ironing. One of my big sewing goals this year is to sew myself a few items which I can wear to work and not feel a slob.
I quite like the idea of high-waist skirts paired with a smart shirt. The problem I have is that I do not like the bulk at the waistline that comes with wearing a shirt tucked into a skirt. Enter the high-waist dress in two tones. I could have used Simplicity’s Project Runway pattern number 2724 but only just having started sewing for myself, I wasn’t confident in handling such a pattern. A quick rummage around in my wardrobe resulted in 3 stretchy cotton shirts from H&M. Two of them were pretty old, very washed and even sported the odd hole or two. Gaining much inspiration from wonderful refashions such as Grosgrain’s Mockingbird frock , Little Red Roost's Alice dress and I Am Momma Hear Me Roar’s terrific sassy-classy dress refashion, I decided to try a refashion of my own using the old shirt and some black Ponte Roma Knit jersey. The first attempted yielded this …
I thought it was kind of cute and was spurred me on to do a second dress – this time I remembered to take photos along the way so I can share the process with you. So I started with the old shirt. I roughly worked out where I wanted the waist of the dress to start and cut it straight across. I then cut the remnants into strips.
Using the skirt from Butterick 5382, I made a skirt with the black knit jersey.
Setting the shirt and the skirt aside, I returned to the strips and serged a rolled hem edge on all the strips. I then gathered the strips to form ruffles. I wanted a few ruffles to jazz up the boring neckline ... make it prettier.
I pinned the ruffles to the neckline and played with a couple of alternatives. Once settled on the version I wanted (the one on the right), I stitched the ruffles down to the neckline of the shirt.
The next thing was to sew the shirt to the skirt. Pinning the two parts right sides together, I stitched all around the edge using a half inch seam allowance. I ironed the seam down towards the skirt and top-stitched all around from the right side.
And finally, I hemmed the skirt using some iron-on hemming tape before sewing a row of stitches an inch from the edge. I find that this gives me a crisper edge on my jersey hems. I also made 3 little tabs and stitched them on as belt loops.
And the final result ...
Ta-da! What do you think? I found it a very useful learning experience and a good way to refashion old work shirts and giving them a new lease of life.
Saturday, 22 May 2010
My first day of blogging ....
.... kinda reminds me of my first day at school. Nervous, no idea what to do, where to go, what to say and no friends .... yet. I was however on that first day of school, very hopeful. Hopeful of a new and exciting beginning. I'm feeling a little bit of that same hope right now. I'd like to share some of the stuff I am making / sewing / doing etc with you. Maybe, somewhere along the way I'll lose the nervousness ... I might even have some idea of what I'd like to do and where I'd like to go in my crafting and sewing adventures. Maybe I'll have something to say and I am very hopeful that I'll make a few new friends along the way.
So thanks for popping by and I hope to see you here again soon.
Subscribe to:
Posts (Atom)