The bottom of the tote is an oblong shape with rounded ends. You’ll need the pattern for the bottom. You can download the pattern from here. It’s a pdf. When you go to print it out, set the Page scaling to None. I’ve provided a 1 inch square so you can check if your printout is sized correctly.
A quick note before we start …. you might notice that the fabrics in the some of the photos are different – that’s because the photos for this tutorial were taken during the making of two different totes. It’s slightly lacking in photos in some parts of this tutorial – sorry about that, it’s really hard to remember to take photos as I sew.
You’ll need the following:
A bit of fabric for the outer shell of the base – roughly 11.5 x 6.5 inches
A piece of fusible fleece or regular batting if you haven’t got any fusible fleece
A piece of fabric for the body of the tote, the inner side of the base and the facing at the top of the tote
A piece of plain fabric (8 x 21 inches) for the handles or 2 lengths of webbing or twill approximately 21 inches long
A 14 inch zip
Double fold bias binding
Thread to match
(I used cotton quilting fabric for this bag.)
Cutting the fabric
You’ll need to use the pdf pattern I’ve provided to cut 3 layers for the base of the tote:
1) fabric for outer
2) batting for the middle
3) fabric for the inner (I used the same fabric for the inner as the body. The inner is what you see when you peer into the finished tote.)
Also cut a small 2 inch x 2.5 inch square from the same fabric as your base outer layer. This is used to make a small tab for the end of your zip.
You will also need to cut one 12.5 inch x 28 inch rectangle for the body of the bag and a strip of fabric measuring 2 inch x 28 inch for the facing at the top edge of the bag.
If you are using plain cotton fabric for the handles, take the 8 x 21 inch rectangle of fabric, mark it into half lengthways and cut it so that you end up with 2 pieces which are 4 x 21 inches.
Making the base of the bag
The base of the bag is also the outside of the pouch. I’ve used a piece of printed quilting fabric but I think you could easily piece some scraps of fabric together and cut out the base shape from your pieced fabric. Make a sandwich by placing the batting in between the outer and lining fabrics. You want your fabrics facing right sides out (wrong sides together). See the three layers in this photo below?
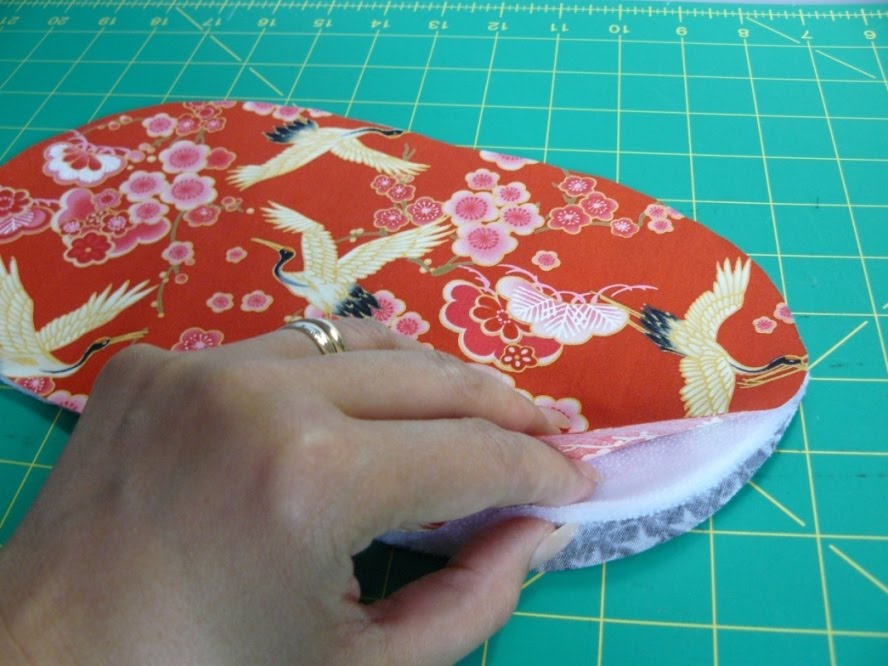
If you are using fusible fleece, you’ll need to iron your sandwiched pieces together to lock them together. If you are using regular batting, pin the pieces together. Sew the 3 layers together. I’ve put 3 rows of stitches half an inch apart right down the middle. You can quilt this any way you wish. I’ve also stitched the 3 layers together all around just inside the edge.

Make the tab for the end of your zip. Fold the little 2 inch x 2.5 inch square in half with right sides together so that the two 2 inch sides meet. Sew the side seams on the tab using a half inch seam allowance so that you end up with a teeny pocket. Clip the corners of the seam allowance and trim the seam allowances down to just under a quarter of an inch. It will be awfully fiddly so do take your time on this part – turn the tab through to the right side and carefully poke the corners out neatly with a pencil or your preferred pointy object. Fold the raw edges inside the tab and give it a press with your iron. Now slot your zip end into the tab until your metal stop reaches the edge of the tab. Sew all around. Here's a sketch of what I mean ....

And here is the zip tab at the end of my zip.

Take your bag base, fold it in half so that the two curved edges meet and make a mark on each side at the fold. See it there right where my finger is?

Take your zip and unzip it all the way to the end. Place the zip right side up crossways to the edge of your base piece at the mark you’ve just made. See picture below. The edge of the tab is roughly 2.4 inches from the edge. You should be able to see the mark you have made between the two sides of the zip.

Fold the sides of the zip over and lay the edge of the zip tape along the edge of your base piece – the teeth of your zip should now be pointing towards the inside of the base piece. Adjust it so that the mark you have made is right in the centre of the triangle formed by the two flipped sides of the zip. Pin the zip to the base piece. See picture below.

Pin the zip all around the edge of your base piece, carefully following the curve.

When you get to the other end of the zip, fold the top end of the zip tape back, then fold the edge down so you get a little triangle. See picture below. Don’t worry about the gap. There should be a little gap there.

If you’re an experienced sewist (unlike me!) you could probably go right ahead and sew the zip down using a quarter inch seam allowance. Make sure you backstitch where the zip tape folds are (two at the top of the zip and two at the end of the zip) to strengthen these points. As I am not terribly experienced yet, I like to hand-baste my zip down first like this.

After you have stitched the zip down, clip around the curved edges with your scissors. Make sure not to accidentally cut into the stitching line.

Do you want to have a go at folding and zipping it up now so you can see what your pouch is going to look like finished? Go on! Here’s mine … How cute is that?!

Here ends Part 1. I'll post Part 2 up tomorrow. In Part 2, we'll look at making the body of the tote and the handles.
Looking good so far! Can't believe you consider yourself inexperienced Ady ... life's too short for basting!!
ReplyDeleteGreat stuff! Can't wait to try it myself!
ReplyDeleteTake care,
Angela
www.sewloquacious.blogspot.com
LOL, Fiona! I am not very skilled when it comes to sewing curved items or around corners. Whilst I agree life is too short for basting - basting is my friend! I find I unpick less if I spare a few moments to baste first.
ReplyDeleteThanks Angela! Let me know how yours turns out if you do try it.
Wow- what a great tutorial. I love little totes like this. I just clicked over from Craft Gossip and I'm so glad I did. I would love to link to this if you didn't mind.
ReplyDeleteMolto bello! Complimenti per l'idea e grazie per il tutorial! Thanks! Ciao pia
ReplyDeleteThis is really helpful. I've been hunting the internet for someone who could show me how to sew a zip on a curve. I'm making bags and I wanted to know how to finish of the ends of the zip. Seeing your pictures has helped me. I think I'll be using open-ended zips from now on and I love the little fabric on the end of the zip too! That also solves my problem.
ReplyDeleteThanks so much! Please take a look at my site: www.lollyvillage.com
Brilliant! Looking forward to trying it out.
ReplyDeleteWow awesome. : )
ReplyDelete